
 |
Right off I am both pleased and disappointed with my first Shapeways print job. Overall, this is quite the rush to materialize an object that comes from a personal desire to create it out of thin air. More on the differences of modeling satisfaction later...
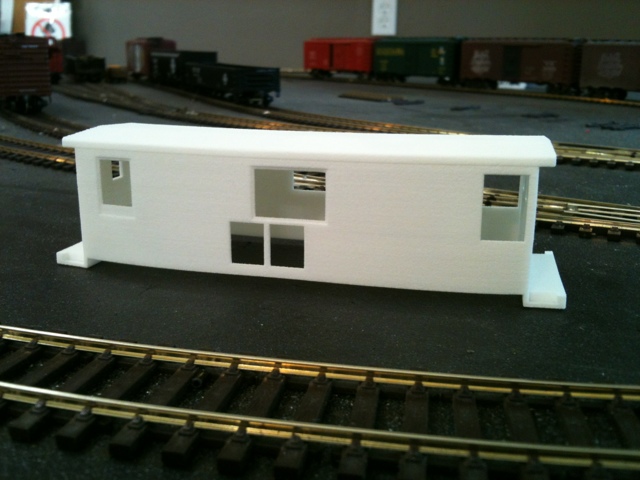
Being a little more critical, the roof is rippled with regular lines running lengthwise. This must be do to the resolution coupled with a slightly curved and pitched section. The ends of the roof are just fine, and I can easily sand the ridges flush. I thought I had opted for the polished option, but alas, I did not, so I'm not sure if that would have taken care of the roof or not. As a result, the model is a little chalky, and the polished option is supposed to be silky smooth like a molded plastic part. There is also a little deflection at the bottoms of the long sides which results in a curved bottom edge. I can probably sand this level. Part of the learning curve, this may be due to the length and narrow wall thickness.
Some of the confusion with the polished option occurred because I had to revise my model several times to fit within the tolerances of their equipment and ended up re-ordering several times because of its being rejected when it went to printing. The last time I ordered, I must have forgotten to add the polished option.
Resolution for the material I chose, "White Strong & Flexible", which is PA 2200, a selective-laser-sintered (SLS) process, was listed at .2mm and wall thickness at .7mm. I had modeled the mullions for the windows to the .7mm tolerance, but I found out this doesn't work for unsupported elements. These I will add with the details, which I can actually get printed as separate items, or simply use styrene or brass which will produce better results anyway. The windows and end doors have an inset of about .2mm to test that detail. It seems perfectly acceptable. Walls were modeled at about 1 mm. A different material may yield even better results. The minimum thickness and detail level is very comparable to injection molded locomotive shells. In fact, I think I will beef up the wall thickness on the next one.
 |
| I had to remove the mullions from the final version to get it to pass pre-printing inspection. |
I opted for the standard plastic material that is "White Strong & Flexible" which is the least expensive at $1.40/cm3. The cost is based on amount of material used, not the overall size of your object, so my total was about $24 for a 4.5" long locomotive shell. There are many other materials you can print with ranging from this basic plastic to stainless steel, an elastic plastic, silver and now even ceramic. I will probably try the "Frosted Ultra High Detail" Multijet Modeling (MJM) material next at about three times the cost, but the resolution is .3mm for the walls with a .1mm tolerance for details. Maximum size is 12x18x15 inches. This is not as strong as the SLS material, but with some increased wall thicknesses, I think a locomotive shell would be just fine. This will allow me to model the roof detail parts on the main model. If this is successful, I will be very excited...
Not to say I am not now. I am thrilled with the project so far mainly because it allows me to take advantage of my virtual 3D modeling skills to create something that is exactly what I draw. This is not always the case when my human hands start cutting styrene or wood. The precision is a seductive element, plus the magic of creating something on a computer screen and having it show up at your door a few days later in physical form is unreal. A very similar (and dopamine induced) feeling as seeing a building I design emerge from the ground into reality. That is the rush a designer works so hard for.
This process of 3D printing speeds up the satisfaction while reducing some of the pain of physically crafting an object. Because of this, the satisfaction is different than crafting a model by cutting, assembling and painting. Modeling in the computer is a much more intellectually satisfying transformation from concept to realization while the completely hand crafted process is a little less of the intellectual (maybe because the design is usually rendered two dimensionally for assembly purposes rather than three dimensionally with a full realization of form and spatial qualities?) combined with the visceral activity of hand manipulation in scratch building.
Now there is still plenty to do in hand finishing this particular model, but I imagine this will feel more like detailing a store bought item than truly building something from scratch. Not necessarily a better or worse thing, it is just a difference that is worthy of thinking about.
No comments:
Post a Comment